Roam Research Docs · Help & user documentation
Create API Tokens
- (how to create Roam API tokens for a graph)
- If you're a developer, you can use these with Roam Backend API or Roam Append API
- Steps to create new API Token
- Walkthrough GIF
- Process is the same for encrypted graphs but you should select the "append-only" scope instead (It is the only option for encrypted graphs)
- Please note that you can only create API tokens for your graphs, not for graphs that have been shared with you
- Steps (if you prefer following via text)
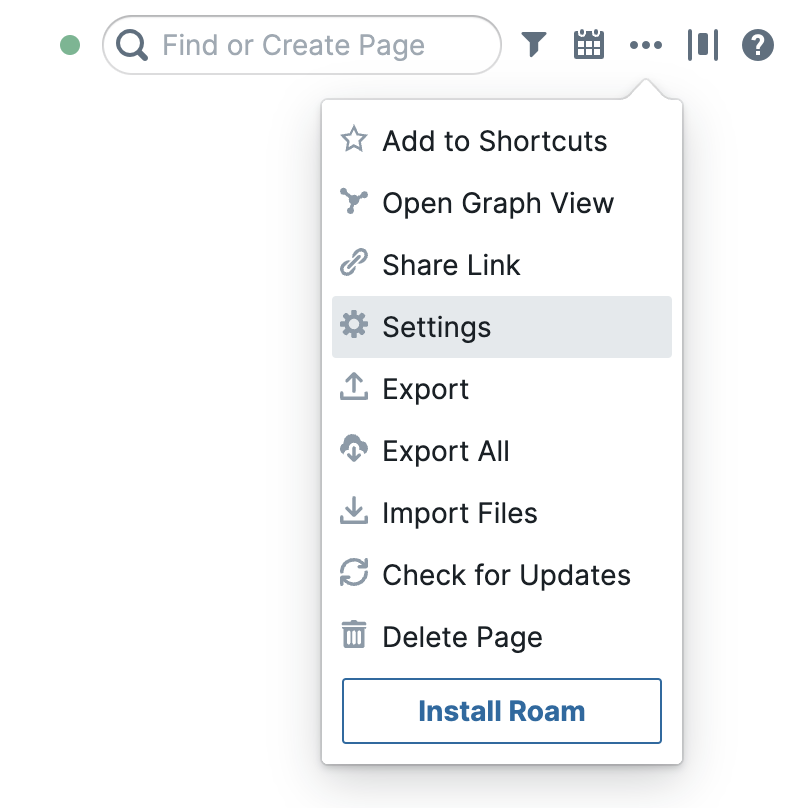
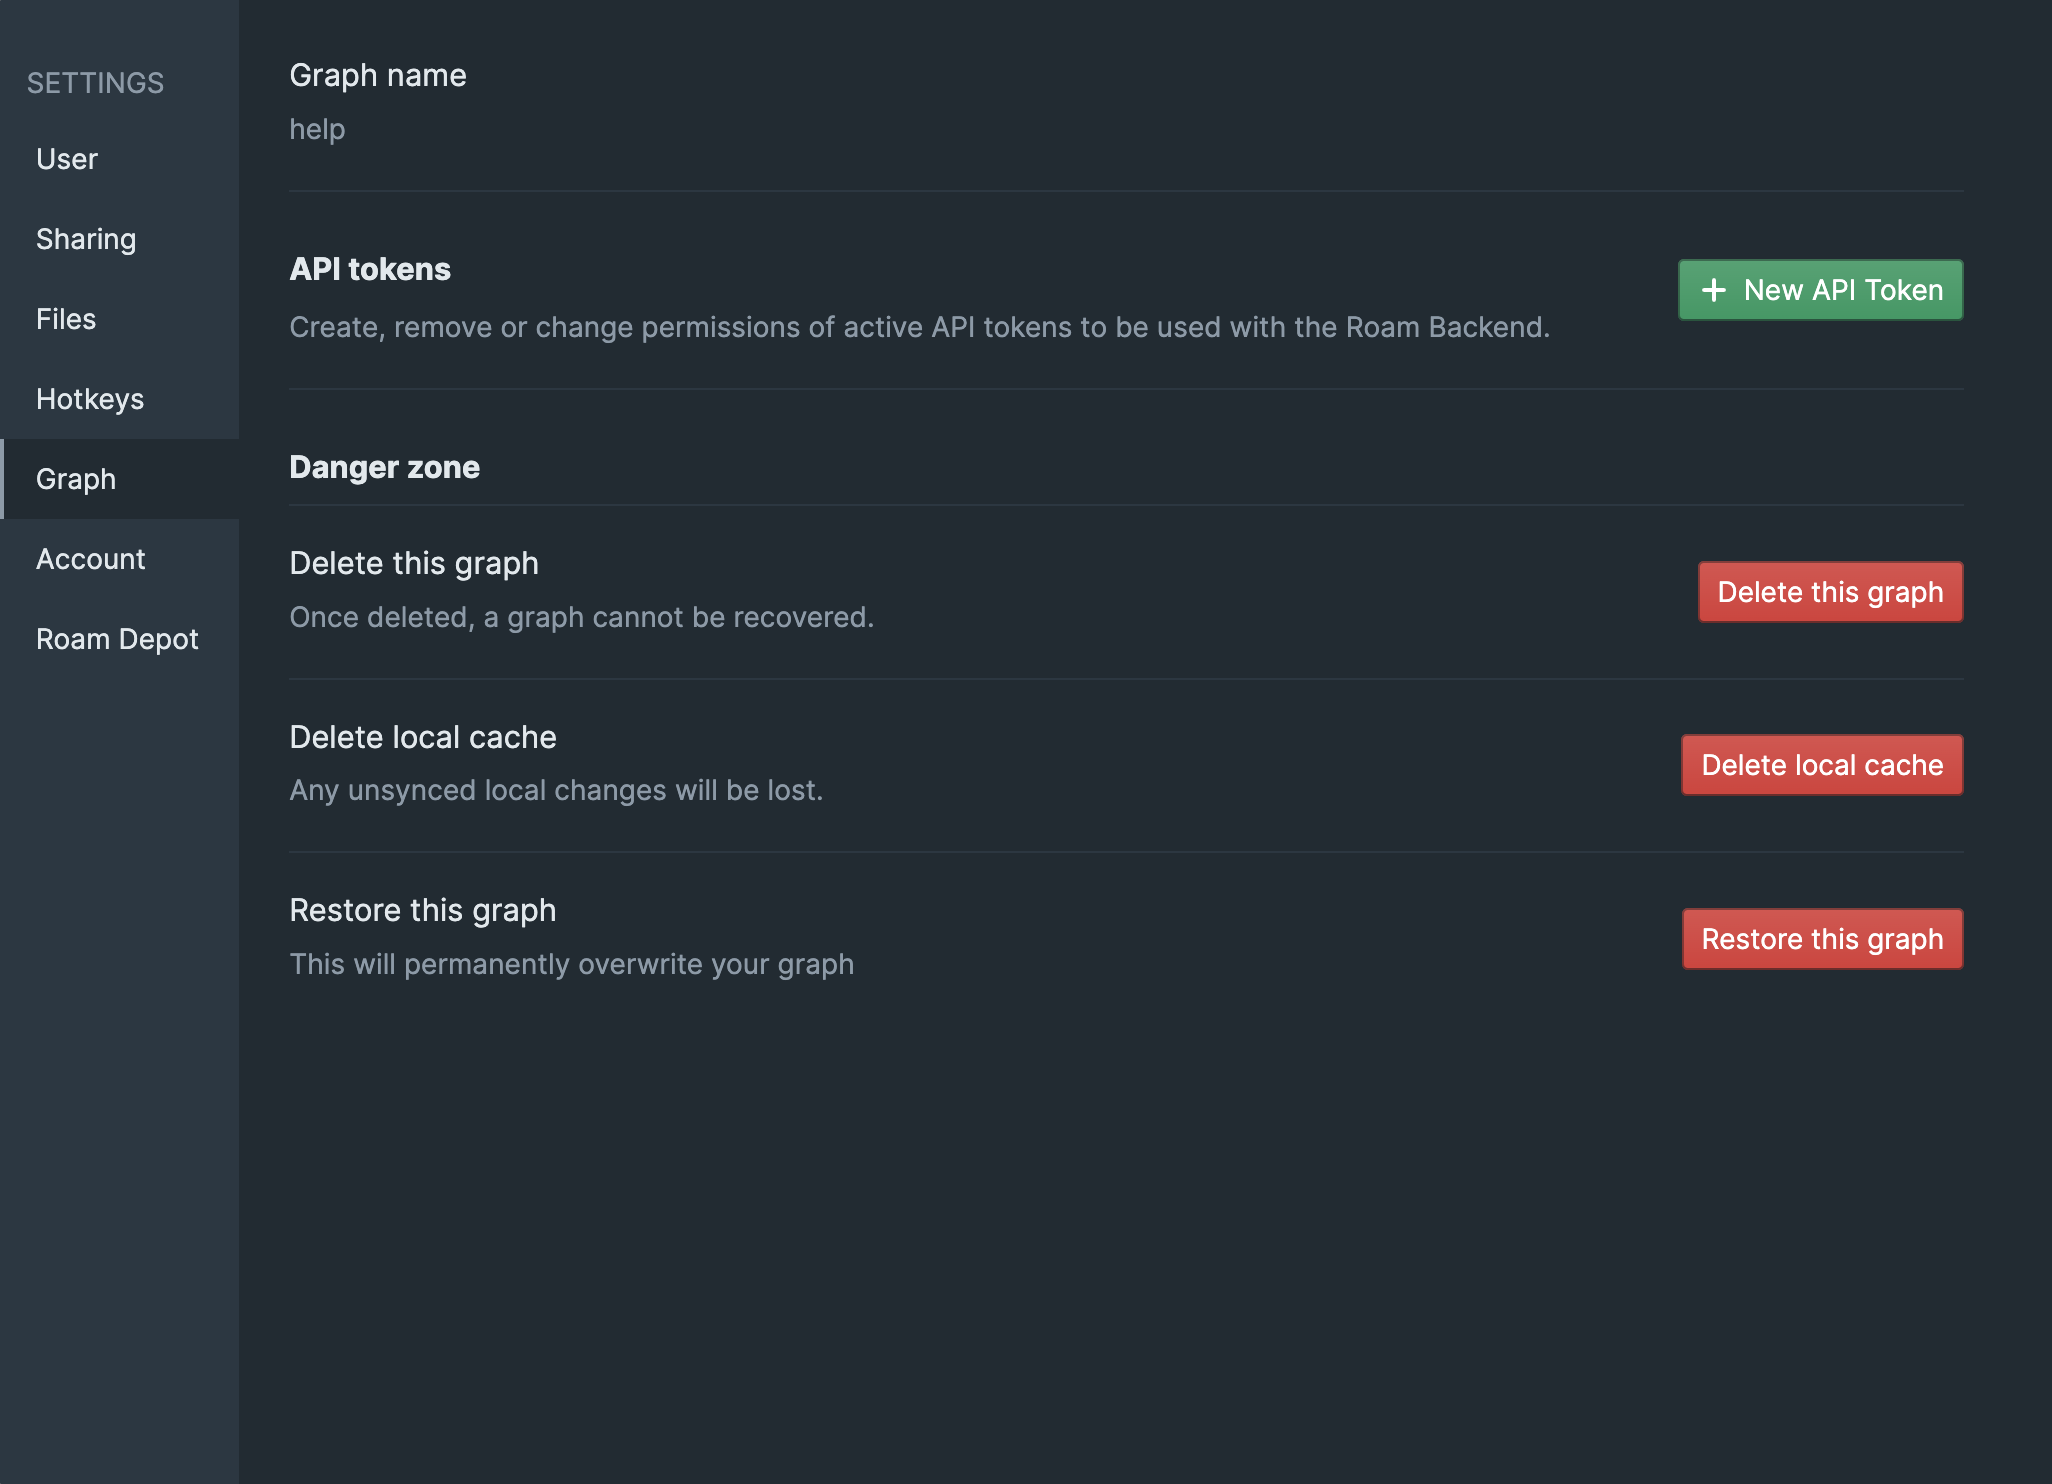
- Open your settings via ... > Settings, then go to the "Graph" tab
- In the "Graph" tab in settings, click on the green "+ New API Token" button
- Do note that you need to be the owner/admin of the graph in order to create API tokens
- After clicking the button, please enter a clear description of expected usage. In the access scope, select read & edit access for unencrypted graphs and append-only access for encrypted graphs. More regarding scope below
- More details regarding scopes for API tokens below:
- read-only access
- (only available for unencrypted graphs)
- This scope only allows access to read to your graph.
- In the case of the Zapier integration, this means that you can only use the "Trigger"s, but not the "Action"s
- read & edit access
- (only available for unencrypted graphs)
- this scope is the most permissive one. It allows the service to both read your graph and edit/add stuff to it.
- In the case of the Zapier integration, this means that you can use both the "Trigger"s and the "Action"s
- append-only access
- (available for both encrypted & unencrypted graphs)
- this access only provides the service ability to add stuff to your graph
- In the case of the Zapier integration, this means that you can only use the "Actions"s, but not the "Trigger"s
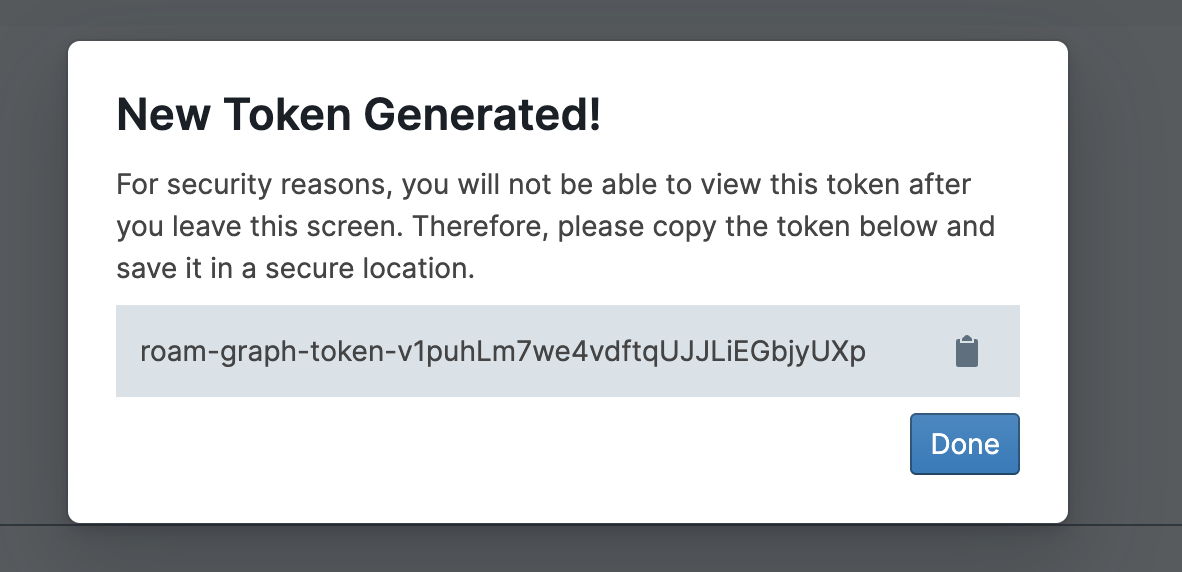
- In the next screen, click on the "Clipboard" icon 📋 to copy the token to your clipboard. It will start with "roam-graph-token-"
markdown version · view in Roam Research · exported 2026-07-03